
Red light facial therapy is really popular now because it’s a non-invasive way to rejuvenate your skin. This treatment uses specific light wavelengths to stimulate your cells, which can improve skin texture, reduce inflammation, and boost collagen production. Lots of people want effective at-home red light therapy routines to deal with acne, fine lines, and improve skin health without seeing a dermatologist. Knowing the right way to apply it, choosing the best device, and following safety tips helps you get the most benefits while avoiding risks from wrong usage.
Table of Content
- Understanding Red Light Therapy Benefits for Facial Skin
- Selecting the Right Red Light Therapy Device
- Preparing Your Skin for Red Light Treatment
- Step-by-Step Facial Application Technique
- Maximizing Results and Combining Treatments
- Safety Considerations and Common Mistakes
- FAQ About how to use red light therapy on face
Understanding Red Light Therapy Benefits for Facial Skin
Scientific Mechanism Behind Photobiomodulation
Here’s how red light therapy works on your face – the devices give off specific light wavelengths, usually 630-670nm for surface treatment and 810-850nm to reach deeper layers.
Your skin cells mitochondria soak up these light frequencies, which boosts ATP production – that’s basically your cells energy source. With more cellular energy, your skin repairs itself faster, makes more collagen and elastin.
and fights off oxidative stress better. Studies show that regular red light therapy on your face can boost collagen density by 31% in just 12 weeks, which is why it works so well for anti-aging.
But the benefits don’t stop at collagen production – there’s more going on biologically. Red light wavelengths actually calm down inflammation by reducing those inflammatory chemicals, making it great for tackling rosacea and acne on your face.
Plus, you get better blood flow that brings more oxygen and nutrients to your skin, while your lymphatic system works better to clear out waste products.
This two-pronged approach tackles both how your skin looks and its underlying health, giving you full facial rejuvenation when you use red light therapy regularly at home.
Specific Skin Conditions Improved by Facial LED Treatment
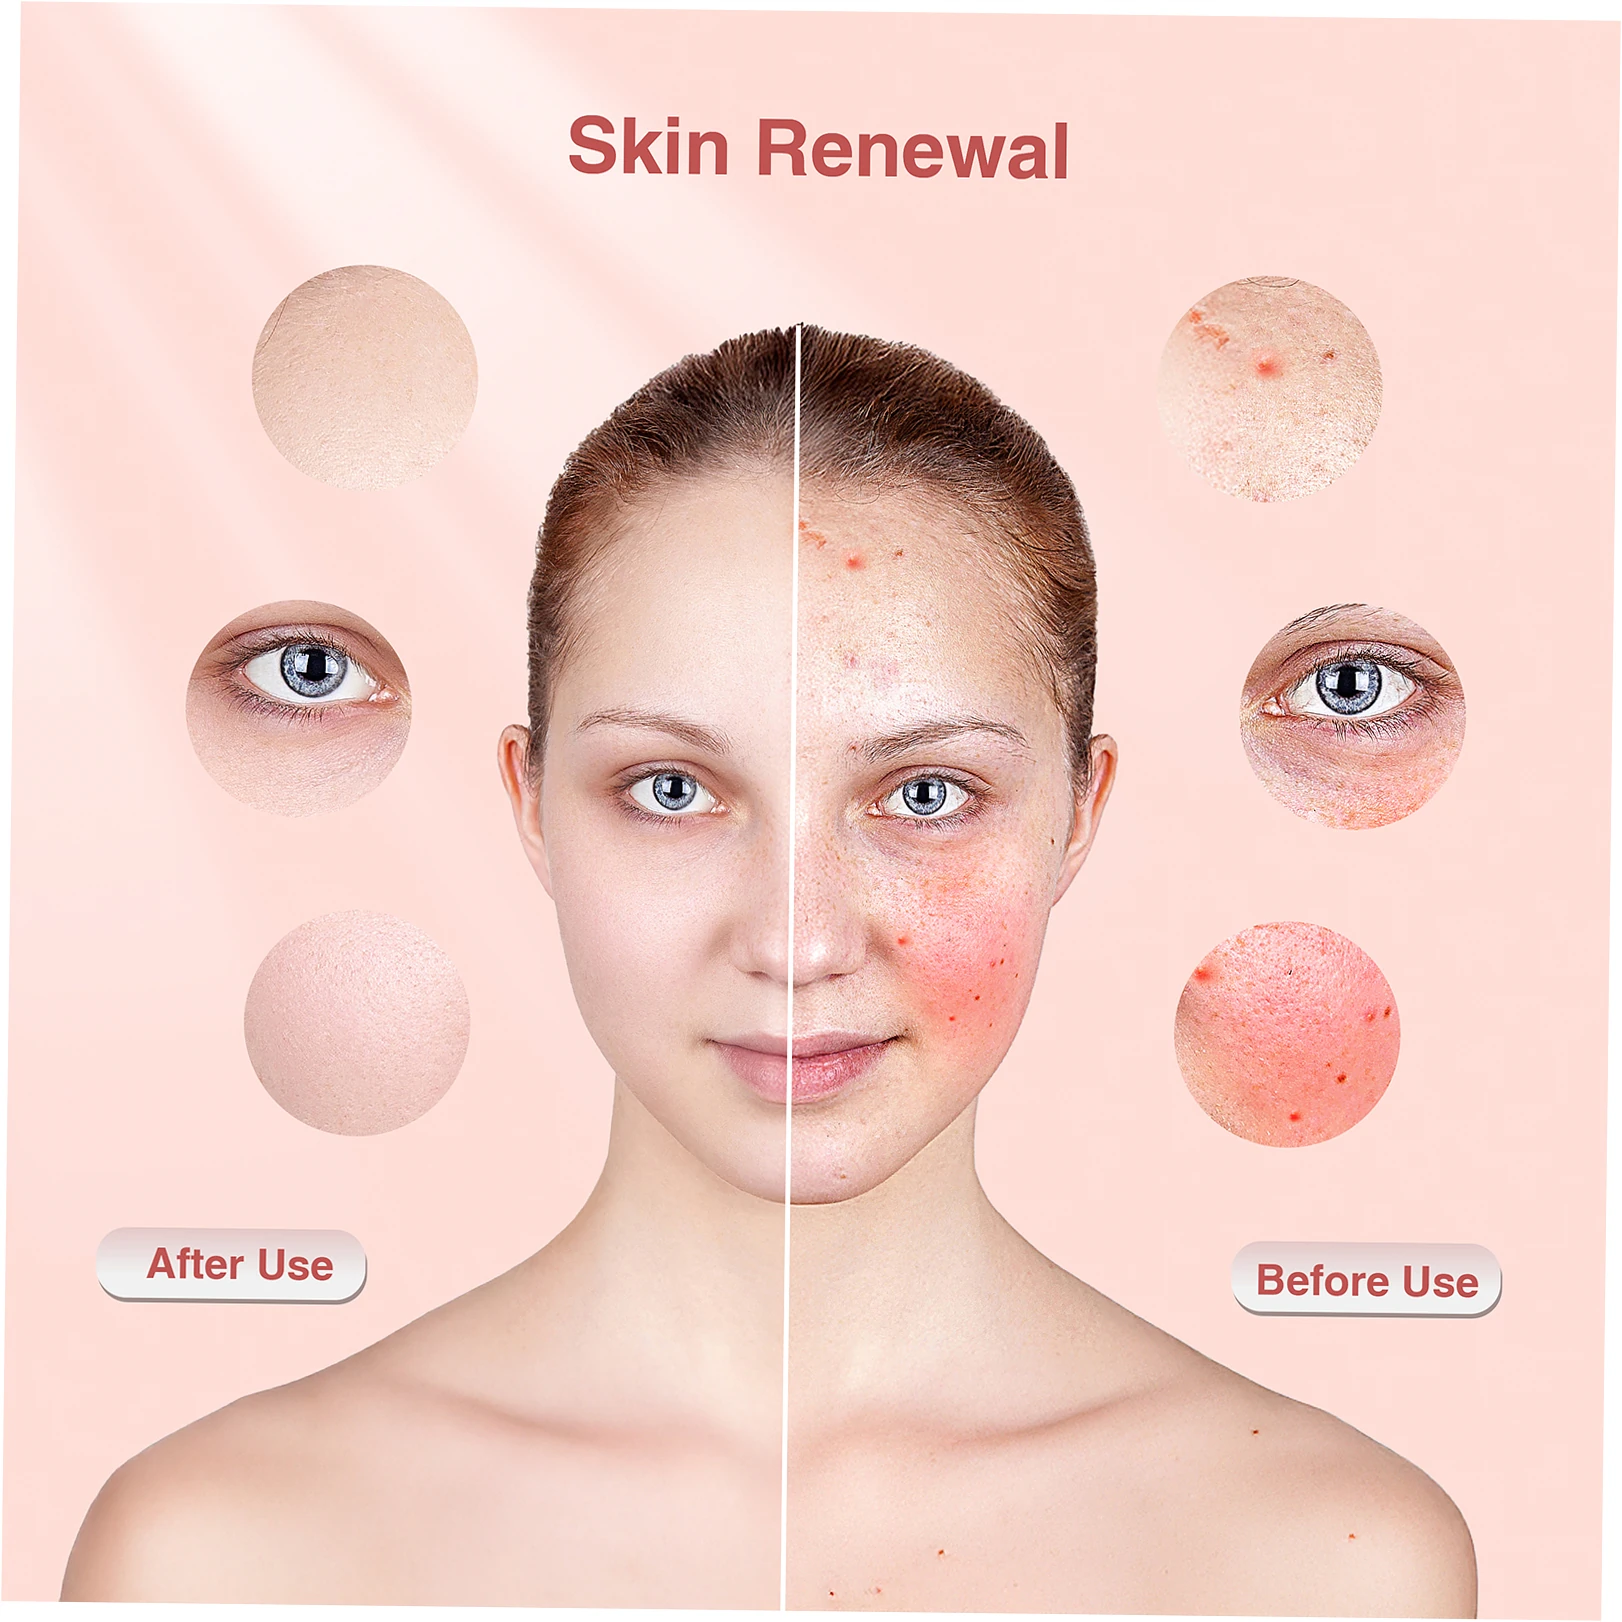
For anti-aging, fine lines and wrinkles really improve with consistent red light therapy on your face. The extra collagen your skin produces plumps it up from the inside, making those aging signs much less noticeable.
In one 12-week study, people using red light therapy three times a week saw their skin complexion improve by 36%, roughness drop by 19%, and wrinkles decrease significantly. To get the best anti-aging results from facial red light therapy, combine it with good skincare and always use sun protection.
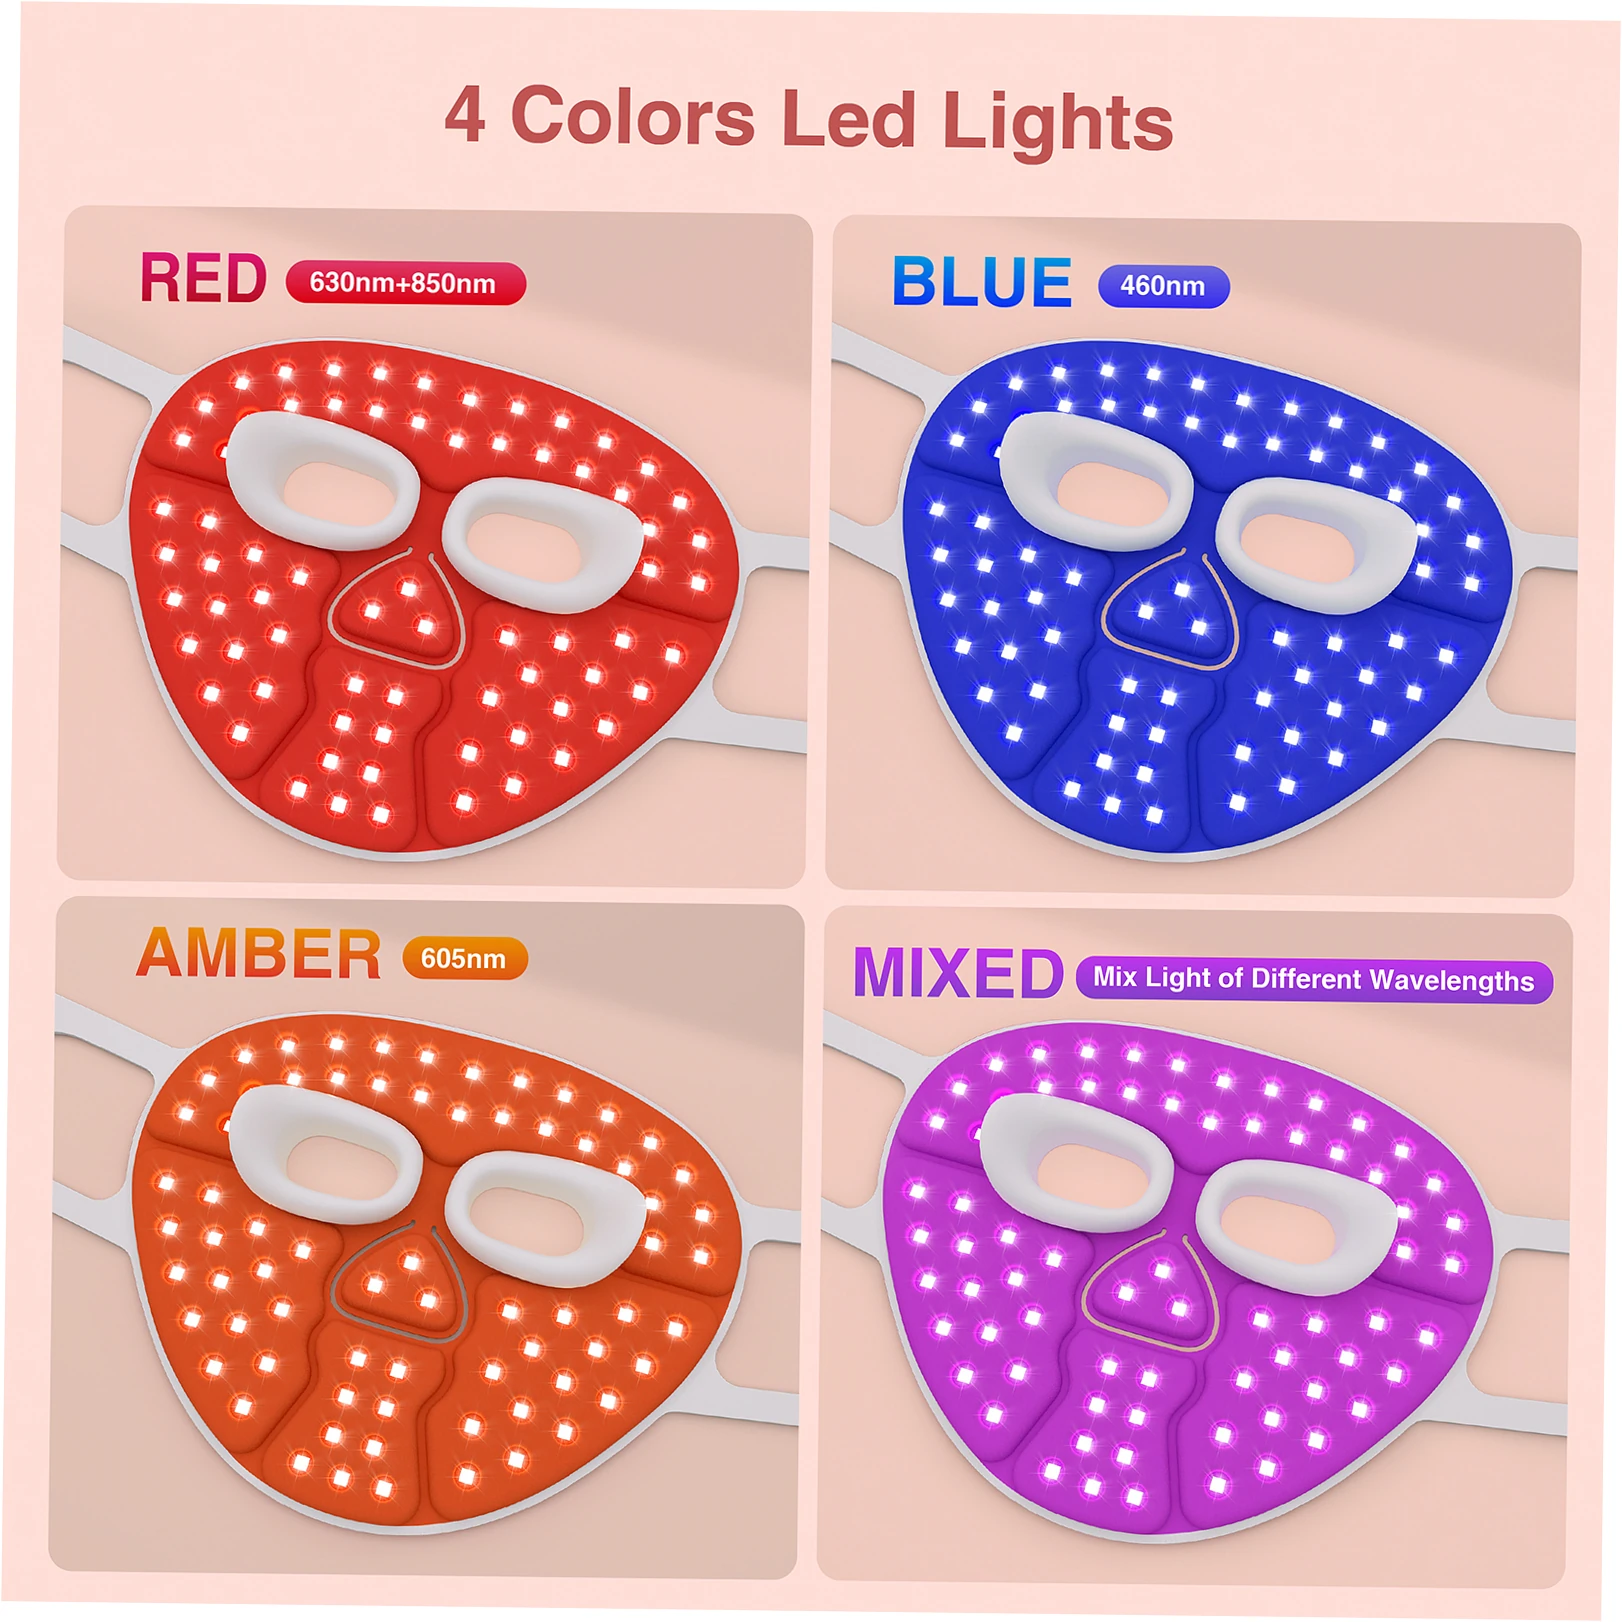
Acne and inflammation reduction: Red light’s ability to fight inflammation makes it really effective against common acne. The light wavelengths soothe irritated skin, cut down redness, speed up healing of current breakouts.
and help prevent new ones from forming. While blue light therapy goes after acne-causing bacteria directly, red light tackles the root inflammation that causes breakouts in the first place.
Lots of users see their inflammatory lesions reduce by 40-50% after 4-8 weeks of regular red light therapy on their face. For complete acne control on your face, some red light therapy devices combine both red and blue light technologies.
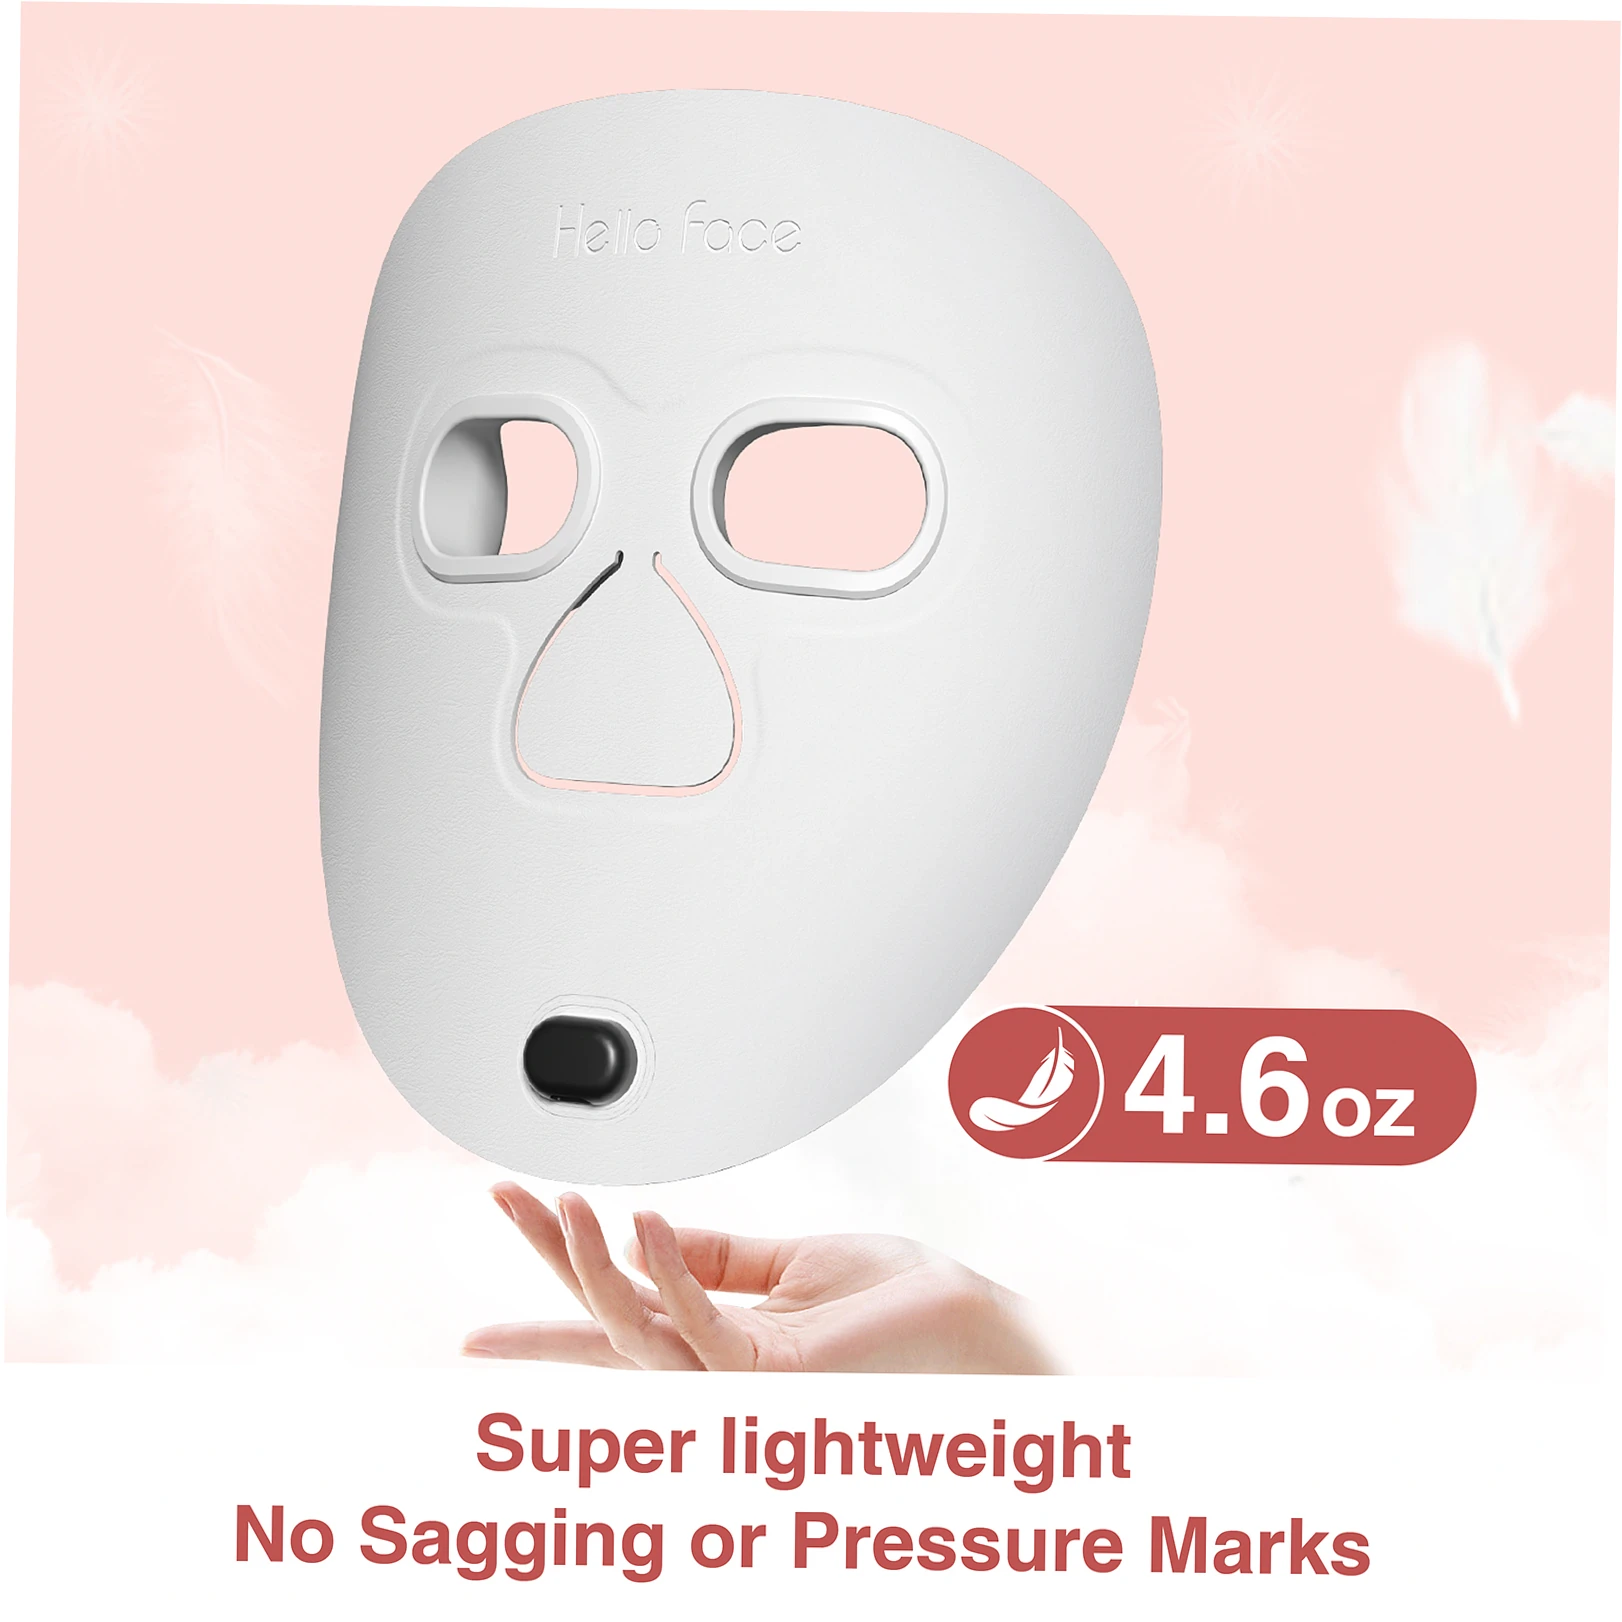
Picking the perfect red light therapy device for your face
Here’s what to look for before you buy
First up, wavelengths matter a lot for facial red light therapy. You’ll want devices that give off 630-670nm red light for surface skin benefits, and 810-850nm near-infrared light that goes deeper.
Studies show 633nm and 830nm wavelengths work best for most skin issues. Steer clear of devices that don’t specify their wavelengths or fall outside these ranges.
Good brands will have third-party lab tests to prove their wavelengths work, so you know you’re getting real photobiomodulation for your money.
Next, consider power density and coverage area – power density affects how well it works and how long each session takes. For home use, aim for 50-200 mW/cm² – that’s the sweet spot between effectiveness and safety.
Higher power means shorter sessions, but you’ve got to follow the instructions carefully. Think about what area you want to cover – masks treat your whole face, while wands are great for spot treatments. Here’s how different devices stack up:
| Type of Device | What It Covers | Best Used For | Session Length |
|---|---|---|---|
| LED Mask | Your whole face | General skin rejuvenation | 10-20 minutes |
| Handheld Wand | Specific spots | Treating problem areas | 3-5 minutes per spot |
| Panel Device | You can adjust the distance | Works for face and body | 5-15 minutes |
Safety certifications and company reputation
First, look for FDA-cleared devices or similar certifications where you live. These certifications mean the device has been thoroughly tested for safety and how well it works.
Specifically, check for FDA Class II clearance for skin treatments – this means it meets strict standards for home use. Also look for electrical safety marks like CE, RoHS, or UL – especially important since these devices touch your skin or use electricity near your face.
Good companies are open about their specs, share clinical research, and have clear customer service policies. Check out the company’s background, read real customer reviews, and see how quickly they respond to questions.
Most good brands offer 1-2 year warranties on home devices, covering any manufacturing defects. Always check the return policy first – many companies give you 30-90 days to try it out and see if it works for your skin issues.
Preparing Your Skin for Red Light Treatment
Essential Pre-Treatment Cleansing Steps
First things first, grab a gentle cleanser to wash off your makeup, sunscreen, and any dirt on your face, but make sure it doesn’t dry out your skin. Don’t use exfoliants, retinoids.
or acid products right before your red light therapy session because they can make your skin more sensitive to light. Gently pat your skin until it’s totally dry – if there’s any water left, it can block the light from working properly on your skin.
To help the red light soak in better, you might try a mild toner first to even out your skin’s pH levels. When you prep your skin this way, you’re setting up the perfect base for red light therapy so your skin cells can absorb all that good light energy.
Now about products – you’ll usually do red light therapy on bare skin, but some products can actually help it work better. Try putting on water-based serums with hyaluronic acid or antioxidants before you start – they can make the treatment even more effective. Just steer clear of petroleum-based stuff, thick creams, or anything with mineral oil since they create a barrier that blocks the light from getting through. If you’re using those special gels with professional red light devices, make sure they’re actually made for light therapy. And always check what your device’s instructions say about which products work best before treatment.
Environmental Setup and Device Preparation
Setting up your space is key – find a comfortable spot where you can do your red light therapy regularly. Get yourself a good chair where you can just relax while the red light works on your face.
Make sure the area’s clean and doesn’t have any shiny surfaces that could bounce the light around weirdly. It really helps to set a timer so you know exactly how long your red light therapy session lasts.
Try working red light therapy into something you already do, like meditating or listening to music, that way you’ll stick with it. When you set up your space right, red light therapy feels less like a task and more like a nice little self-care moment.
Before you start each session, give your device a quick check – look at the LEDs, lenses, and cords for any damage. Wipe down the part that touches your face like the instructions say – usually just a soft dry cloth or special wipes will do.
Make sure your device is either fully charged or plugged in properly. Keep your face at the right distance from the device – that’s usually about 1 to 6 inches away, depending on how strong your device is.
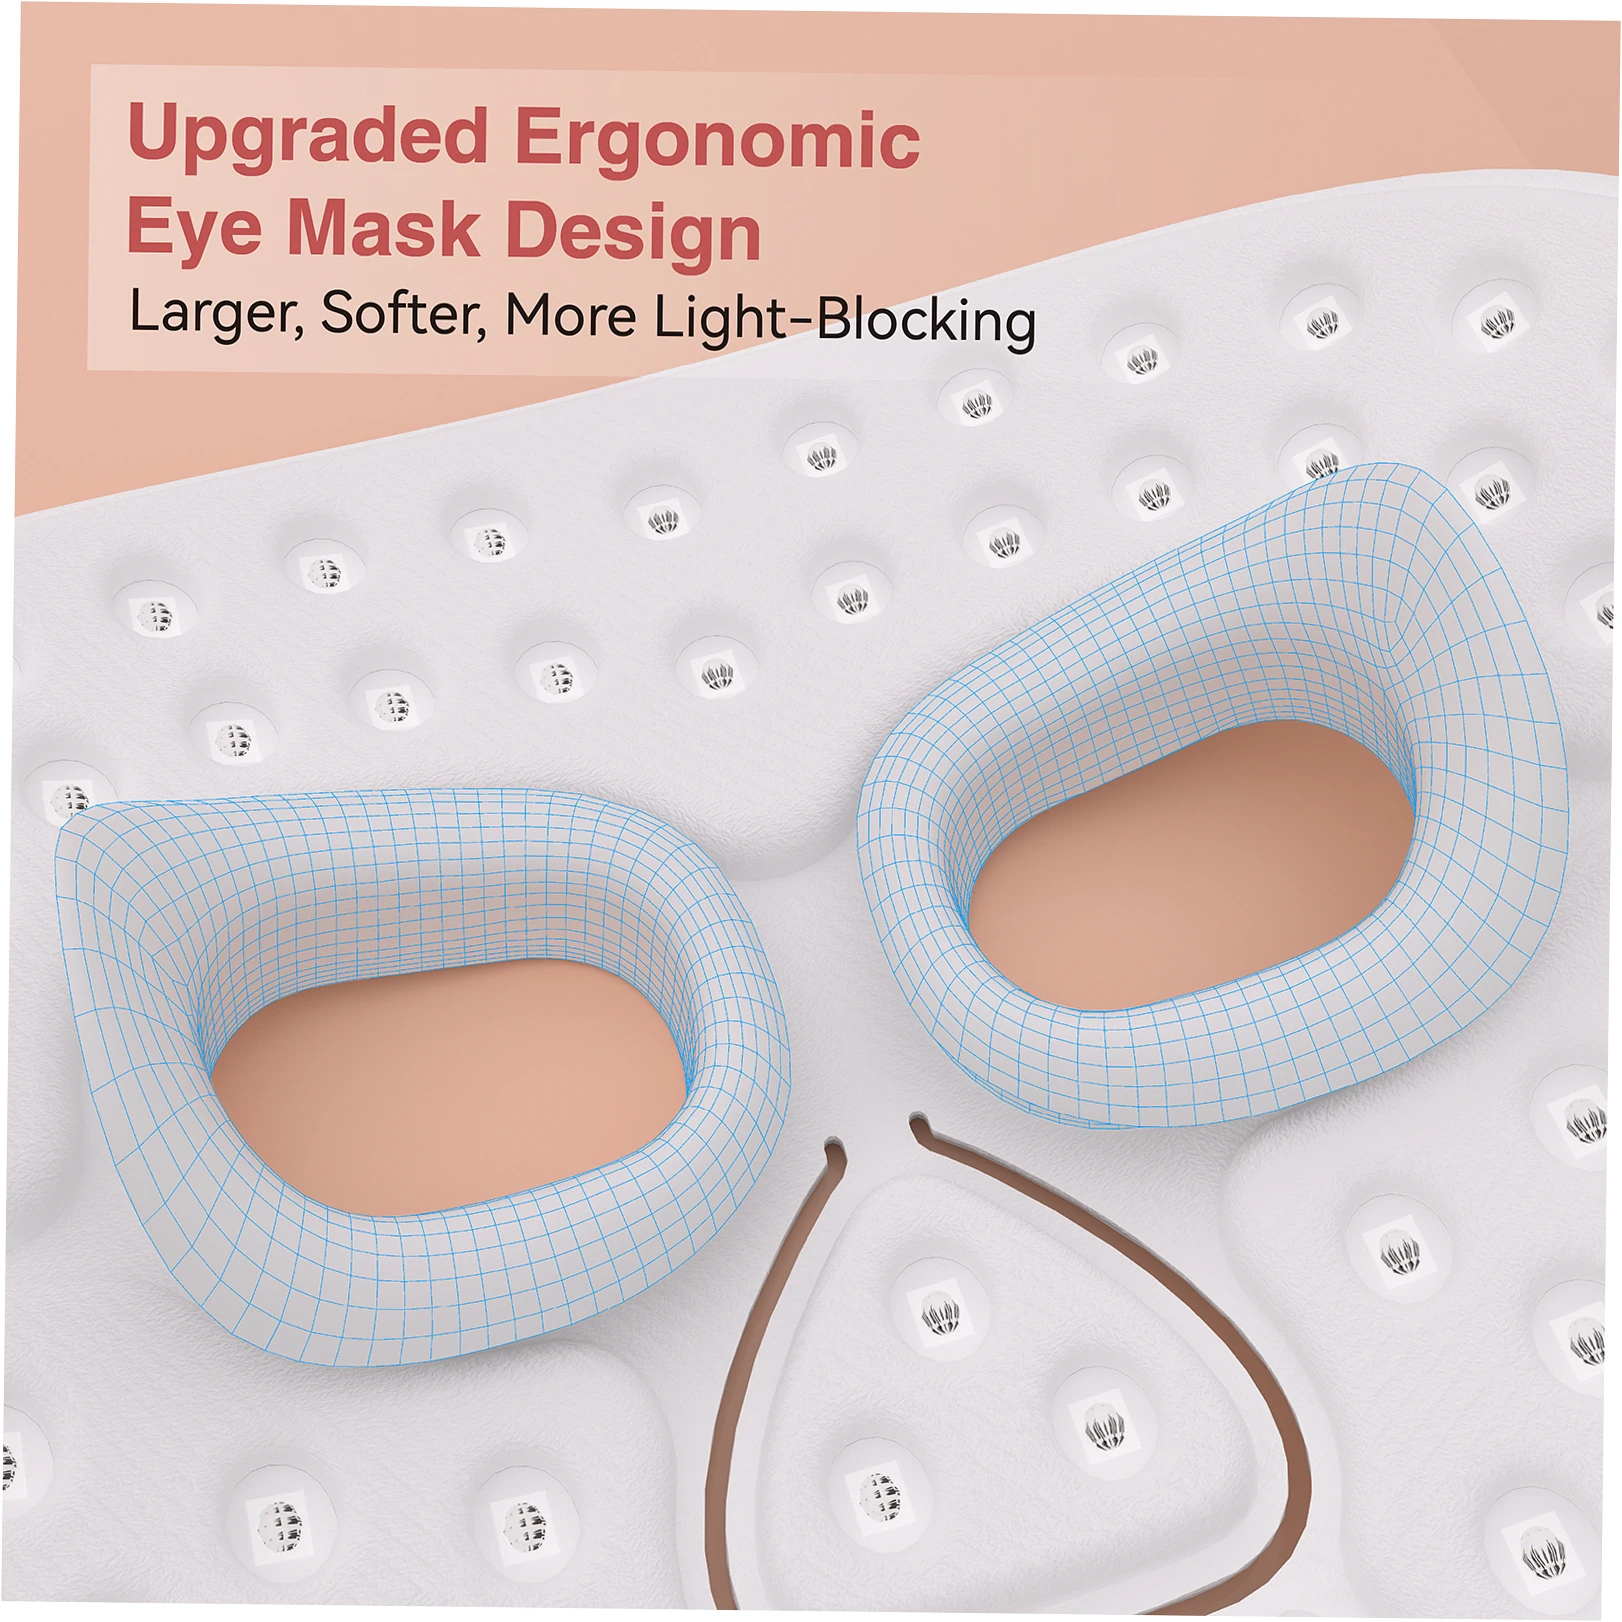
A mirror comes in handy for getting those tricky spots like around your nose and under your chin with handheld red light devices.
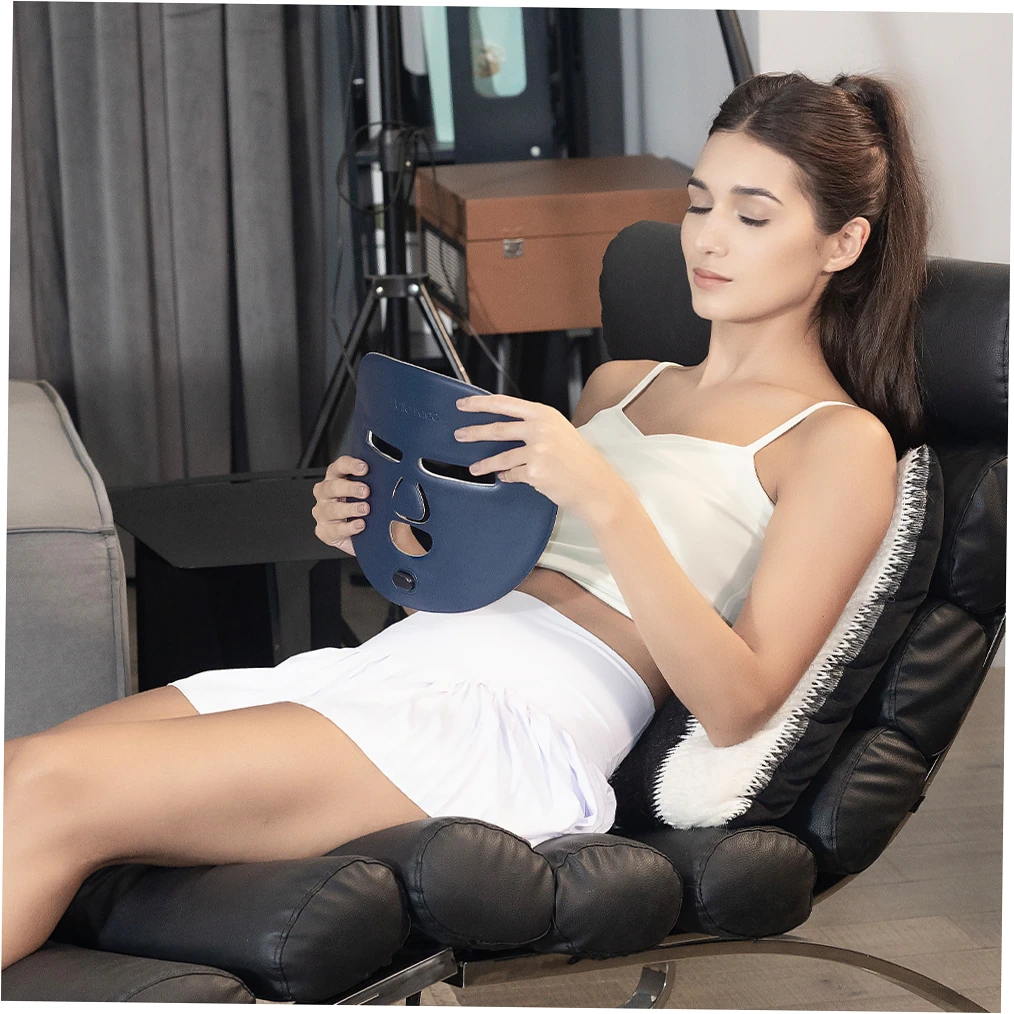
Step-by-Step Facial Application Technique
Optimal Treatment Positions and Movement Patterns
When you’re using handheld red light therapy devices, start with your forehead. Move in slow, overlapping circles from the middle outward. Then work your way down to cheeks, nose, and chin, making sure every spot gets the same amount of light.
Spend about 2-3 minutes on each section of your face for full coverage. To treat both sides evenly, just picture your face divided into sections and give each one equal time.
If you’re using a mask device, make sure it’s positioned right so the LEDs reach all parts of your face evenly. This careful approach makes sure light reaches every part of your face consistently.
Pay attention to angle and pressure – keep the same contact or distance your device instructions suggest. Don’t push too hard with handheld units – that can reduce blood flow and make the treatment less effective.
Hold the device straight against your skin, not at angles, so the light penetrates best. For tricky spots like nose creases and under-eyes, gently adjust how you position your face or use special attachments if you have them.
Using the right technique means your whole face gets even treatment, with no spots getting too much or too little light.
Session Duration and Frequency Guidelines
For scheduling your red light therapy sessions, most companies say to begin with shorter 3-5 minute sessions, 3-5 times a week. As your skin gets used to it, slowly work up to 10-20 minutes daily.
Being consistent matters more than doing super long sessions – regular shorter treatments usually work better than occasional long ones. Studies show you’ll see the best results after 8-12 weeks of regular use.
Lots of people do their facial red light therapy in the morning to help collagen production during the day, or at night to support skin repair while they sleep. Here’s a sample schedule to follow:
| Week | Frequency | Session Duration | Expected Benefits |
|---|---|---|---|
| 1-2 | 3-4 times weekly | 3-5 minutes | Initial hydration, reduced redness |
| 3-6 | 5-6 times weekly | 7-10 minutes | Improved texture, brightness |
| 7-12 | Daily maintenance | 10-15 minutes | Collagen improvement, wrinkle reduction |
Maximizing Results and Combining Treatments
Supportive Skincare Routine Integration
Post-treatment product application: Right after you use red light therapy on your face, your skin soaks up products way better. Slap on some antioxidant serums like Vitamin C, E.
or ferulic acid to really boost your skin’s defense against pollution and sun damage. Hyaluronic acid serums make your skin extra plump and hydrated, and peptide creams work great with the red light therapy to help your skin produce more collagen.
Just don’t use retinoids or strong acids right after your session though – your skin might be a bit sensitive for a while. Lots of people find their regular skincare stuff works even better when they use it along with their red light therapy routine.
Complementary treatments: Red light therapy for your face plays nice with some other treatments too. If you give your face a gentle massage first, it gets blood flowing and helps the red light sink in deeper.
Using a microcurrent device after your red light session can really amp up the facial toning effects. But skip the really hot treatments, harsh scrubs, or professional peels on the same day you do red light therapy.
If you’re using strong stuff like high-percentage retinoids, wait a few hours before or after your red light session. Always take it slow when trying new combos and keep an eye on how your skin reacts.
Progress Tracking and Result Optimization
Documentation methods: Keep a simple log where you jot down how often you use red light therapy, how long each session is, and what you notice about your skin.
Snap some photos each month in the same spot with the same lighting so you can really see the changes. Pay attention to specific improvements like less redness, fewer fine lines, or that overall glow.
Most people start seeing some benefits in 2-4 weeks – like better hydration and less redness – but the bigger changes in skin structure usually show up after 2-3 months of regular use.
Tracking your progress this way helps you fine-tune your routine and shows how red light therapy keeps working better the more you stick with it.
Adjustment strategies: If you stop seeing improvements after a while, don’t quit – just mix up your routine a bit. Try doing more sessions rather than longer ones – five quick 10-minute sessions usually work better than two long 25-minute ones.
Make sure you’re still holding the device at the right distance – it’s easy to get sloppy with your technique after a while. Think about other things that might be affecting your results – like new medications.
weather changes, or switching up your skincare products. Sometimes taking a week or two off can actually help – when you start up again, your skin might respond even better.
Safety Considerations and Common Mistakes
Eye Protection and Contraindications
For eye safety during red light facial therapy, always wear the goggles that come with your device or just keep your eyes shut. Red light is usually fine for your eyes.
but staring directly at those bright LEDs for too long might make you see spots or feel uncomfortable. If you have sensitive skin to light, take certain medications, or had skin cancer before.
check with your doctor first before starting facial red light therapy. Even though red light therapy is pretty safe, pregnant women should still talk to their doctor before using it on their face.
Always follow the safety instructions that come with your red light device – how long to use it, how to care for it, and electrical safety stuff. Don’t use a broken red light therapy device or try to fix it yourself – get help from a professional.
Never stare right into the working LEDs, and make sure your device is placed securely so it doesn’t fall. Be extra careful with plugged-in devices around water – keep them away from sinks or bathrooms.
Following these simple steps keeps your facial red light therapy working well and totally safe as part of your skincare routine.
Troubleshooting Suboptimal Results
The biggest mistake people make with red light facial therapy? Not using it regularly enough – that’s why many don’t see good results. Life gets busy, I get it, but if you skip too many sessions each week.
you won’t get the full benefits that build up over time. Another common goof? Holding the device too far from your face – when you go beyond the recommended distance, the light doesn’t reach your skin strongly enough.
On the flip side, putting it too close can make it feel uncomfortably hot on your skin. With mask-style devices, make sure it’s touching your whole face, and with handheld ones, keep a steady distance.
How long you treat each area matters too – if you rush through it and miss spots, you won’t get the best results from your red light facial therapy.
If you’re using your red light device right but still not seeing good results, check if it’s working properly. See if the LEDs look as bright as when you first got it – some devices get dimmer after lots of use.
Make sure it’s charging correctly and the power connection is good. Check how long the manufacturer says it should last – good red light therapy devices usually work well for years with regular use on your face.
If you’re having issues, try contacting the manufacturer’s support team – they can help. Sometimes you might need to get your device adjusted or even replaced to keep seeing those facial improvements you want.
When you use red light therapy on your face the right way, it’s actually backed by science to improve your skin’s health and look. If you stick with it using the right technique and device, you should notice better skin texture.
more even tone, and healthier-looking skin after several weeks of regular red light facial therapy. Just remember – everyone’s results will be different depending on your age, your skin’s condition, and how consistent you are with treatments.
People who get the best results from facial red light therapy make it part of their overall skincare routine, instead of expecting miracles from it alone.
FAQ About how to use red light therapy on face
How close should red light therapy device be to face?
The best distance really comes down to what kind of device you’re using and how strong it is. For most handheld devices, keep them about 1-3 inches from your skin, but panel devices usually need more space – around 6 to 12 inches away.
LED masks work best when they’re touching your clean, dry skin directly. Always check the manufacturer’s instructions because if you’re too far away, it won’t work as well, and if you’re too close, it might feel uncomfortable.
The important thing is to keep the same position during your whole session so all parts of your face get equal light coverage.
Can I use red light therapy after microneedling?
Absolutely! Red light therapy works great with microneedling if you time it right. Just wait a day or two after microneedling before starting your red light therapy again – this gives your skin time to start healing.
Red light helps reduce inflammation, which can speed up healing, and since microneedling creates tiny channels, your skin might absorb the light better, making the treatment more effective.
Lots of skin experts love this combo for overall skin renewal, but definitely talk to your provider first since everyone’s skin sensitivity and treatment needs are different.
Should I apply skincare products before red light therapy?
Usually, you’ll want to use red light therapy on skin that’s clean and free of any products so the light can penetrate properly. Heavy creams, oils, and mineral sunscreens can block the light and make it less effective.
But some water-based serums with hyaluronic acid or antioxidants might actually boost the benefits if you put them on before your treatment. If your device needs special gels, make sure they’re made specifically for light therapy.
After your treatment is actually the perfect time to apply most skincare products because your skin is extra absorbent then.
How long until I see results from facial red light therapy?
You might notice your skin looking more hydrated and less red within the first few weeks if you’re consistent with your treatments. For bigger changes like fewer fine lines and smoother skin texture, that usually takes a couple months of regular use.
Studies show that with regular use, your collagen keeps improving for about six months. To get the most out of it, you need to stick with it – using it now and then gives temporary results, but making it part of your regular routine builds up lasting improvements for your skin’s health and look.